09. How to make paper CD case?
Origami CD case is the simplest and the fastest way to organize lots of discs. Paper CD sleeves are durable, affordable and, unlike plastic CD cases, they are rather thin and do not consume as much space on your table or on a shelf. Moreover origami CD cases do not require any glue or sticky tape. This tutorial will instruct you how to make paper CD case with the best Label Maker ever from RonyaSoft!
Why to make paper cases for your discs
Each new disc must be identified and protected in some way. Plastic cases are much more expensive and can not be done on your own. Moreover, you will anyway need to make a new insert each time you will use this plastic case for a new disk. Making a new insert takes as much time (and sometimes even more) as creating a foldable paper sleeve. Our step by step guide shows how to make paper CD case in 7 easy steps. All steps are illustrated with images.
Pro tip #1
Durability and quality of origami CD cases depends on the quality of paper you use for your paper CD sleeves.
Origami is an art of folding paper in a specific way so the item keeps form without any additional glue or sticky tape. The art comes from Japanese culture. There are many books teaching the origami techniques. But to make a simple origami CD case you do not need any of the weird techniques as well as you do not need to waste hours on training the skills to fold the paper.
All you need to start creating paper CD sleeves for your collection of discs is RonyaSoft CD DVD Label Maker, high quality paper and a usual office printer. Download a trial version of the software from here. Follow the installation steps and start the application.
RonyaSoft CD DVD Label Maker is a complex graphic editor optimized for creation of CD labels, stickers, cases, inserts, sleeves and envelopes. The software comes with a collection of templates: labels, sleeves, inserts, covers and origami CD cases. The templates contain thin folding lines and are optimized to a standard A4 format. A standard sheet of paper is enough to create a perfect origami CD case.
Pro tip #2
You can use textured paper or color paper to make your origami CD case look even more original.
Start label making application and choose an option Start from template. This step will take you to the selection of CD labeling templates. Choose origami CD case and hit OK button. A chosen template will be launched to the graphic editor.
Here you can edit all necessary blocks, add effects, pictures, text, move, rotate or resize the blocks.
To edit text information, double click text blocks in the template and enter necessary text. All text styling options are in the menu from the right. Try adding some effects to make your text look more professional. You can set font family, font size and color, exact placement, opacity, gradient, outline, ect.
In the menu from the left you will find additional tools of text inserting. You can use fancy text options to make your captions look more outstanding in the origami CD case holder design.
Keep in mind the key rules of CD case caption:
- Only essential information must be on the case;
- The text must remain noticeable and readable in the design;
- Symbols and icons are processed by human mind 60 times faster than words, so choose a symbol which will have instant recall of disc content (for example, this can be gear wheel for software, note for music or a letter for documents.
If you choose plain white paper for your origami CD case, you can also set a background choosing one of standard background options or uploading your own patter or photo to be used as background.
After your template for paper CD sleeves is ready, just it a printer button and set a necessary number of copies.
We do not recommend changing any printing settings. All the default settings will provide excellent result.
Step 1
(Click to enlarge)
Folding origami CD case from an A4 sheet
After you print the template of origami CD case you need to fold the sheet into a paper CD case.
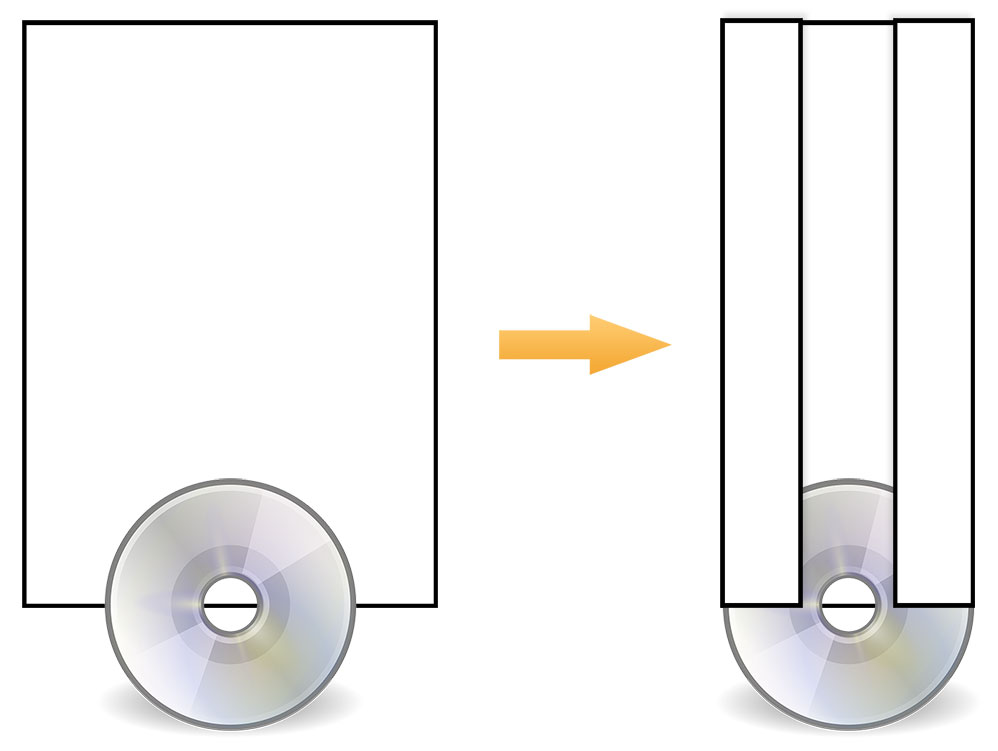
To do so you need place a CD disc at the top edge of your origami CD case in such a way that the top edge bisects the disc in equal parts as it is sown in the picture 01.
Next, fold the left and the right long edges of the future CD case over the disc (look at the picture 02).
Step 2
(Click to enlarge)
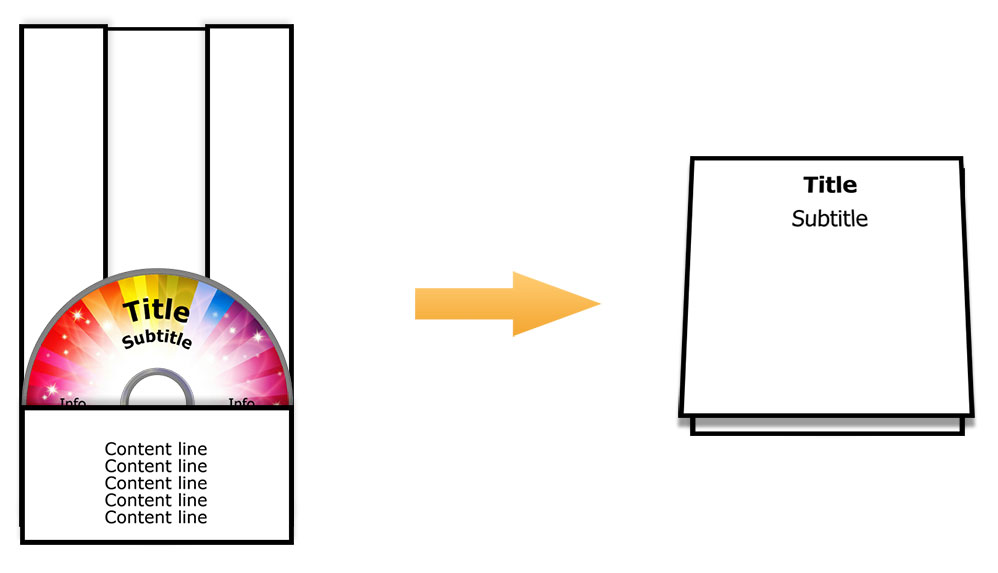
Next fold the disc to the center inward and fold the free edge of the origami CD case to the disc as it is shown in the pictures 03 and 04.
Step 3
(Click to enlarge)
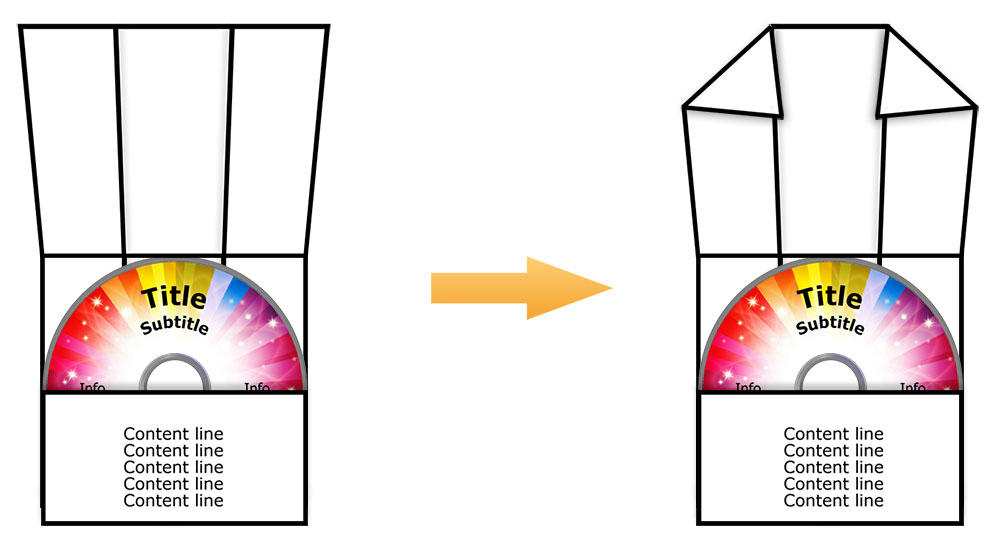
Now open your almost-ready CD paper case and fold the ends of a free edge so it becomes narrower (as in the pictures 05 and 06). Put the disk into the bottom edge and cover the disc with free narrowed edge. Tuck narrow edge into the bottom edge of the paper CD case holder ((as in the pictures 07 and 08). You are done!
Step 4
(Click to enlarge)
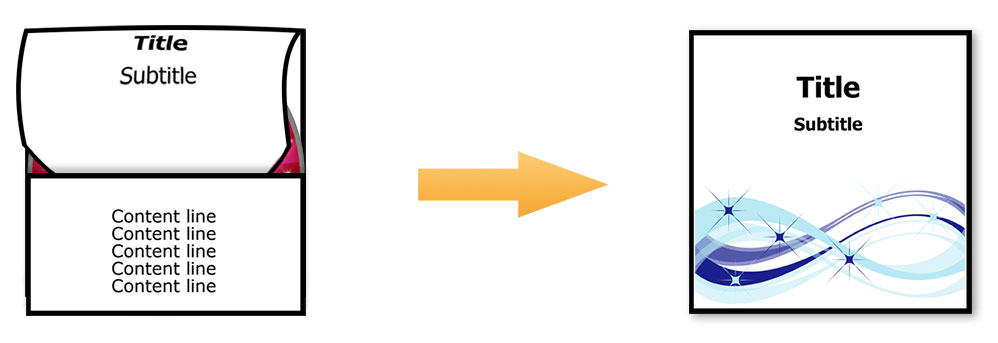
RonyaSoft allows you to create fancier origami CD cases with lots of folds and in rather original shapes. These paper CD cases take more time and efforts, but they look more sophisticated. You can learn how to make paper CD cases of such an original form in our next tutorials.
Summary
We described the simplest way of how to make paper CD case. A simple origami CD case takes only 7 steps to get ready. Such paper CD holder is durable, simple and usable. Paper CD sleeves are applicable in many areas of activities and not only for home use. You can print and fold origami Cd cases and use them as an original package for business presentations, marketing kits, catalogues of products.
Paper CD case holder is a cost effective solution for those businesses which use many CDs as mediums of marketing messages for end customers and partners. Origami CD cases are best to use at home for organizing music, film and photo collections of CD and DVD discs.
Pro tip #3
You can make an origami CD case following these steps even without printing a template with a usual plain sheet of paper. However RonyaSoft template contains folding lines which simplify the process.