09. How to make an infographic?
Infographic maker from RonyaSoft creates pro looking infographic projects in few simple steps. Infographic is a visual format of information representation designed for better information organization to present large amounts of data to make them easily understandable at a single glance, for quick communication of a message. Infographic is used in business presentations, in educational process to simplify understanding of complex matters for kids.
To make infographic without specific tools is impossible unless you want it look laughable. From this review you will find out how to make infographic with RonyaSoft Poster Designer. Be sure, your projects will look the same high quality as our example, which we have made for you to present a full cycle of infographic design.
In this tutorial we will show you how to make an infographic poster from a template using RonyaSoft Poster Designer.
The Save Energy Infographic Poster
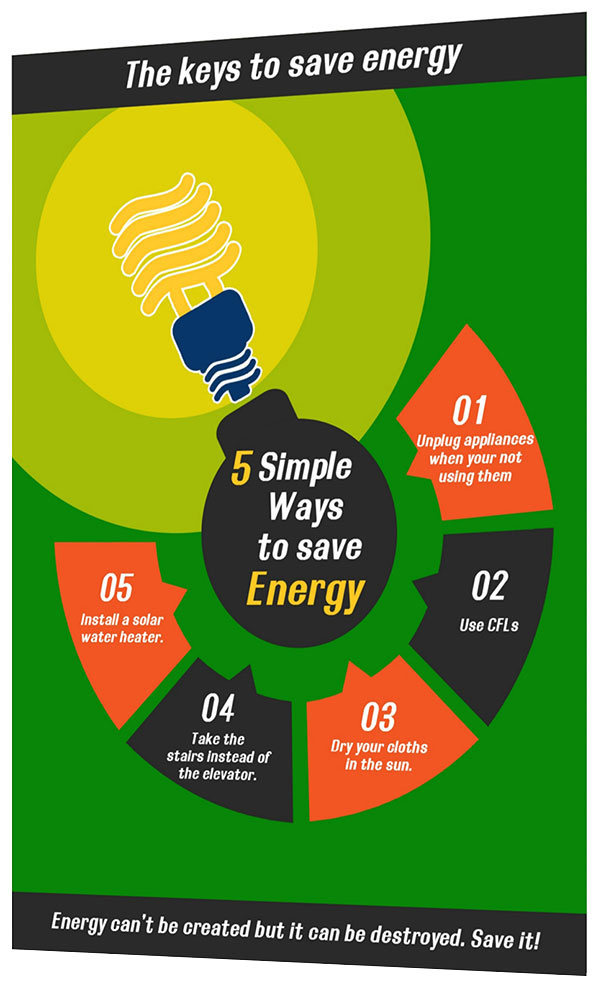
(Click to enlarge)
1. Choosing a template for infographic
First of all you will need an infographic maker from RonyaSoft which you can download right from this page. Follow the installation wizard to get started. The infographic maker will be ready to make an infographic for you right after the installation.
The poster maker from RonyaSoft offers various templates organized in categories, which you will see in the left side of the 'Choose a Template' dialog box. Select a desired category and available templates will be shown in the central window. On clicking a desired template you will see if in the right part of the window. If you like a chosen template, click 'Ok' button to proceed to graphic editor where you will change all necessary objects. The templates are completely editable.
Choose a Template Dialog Box
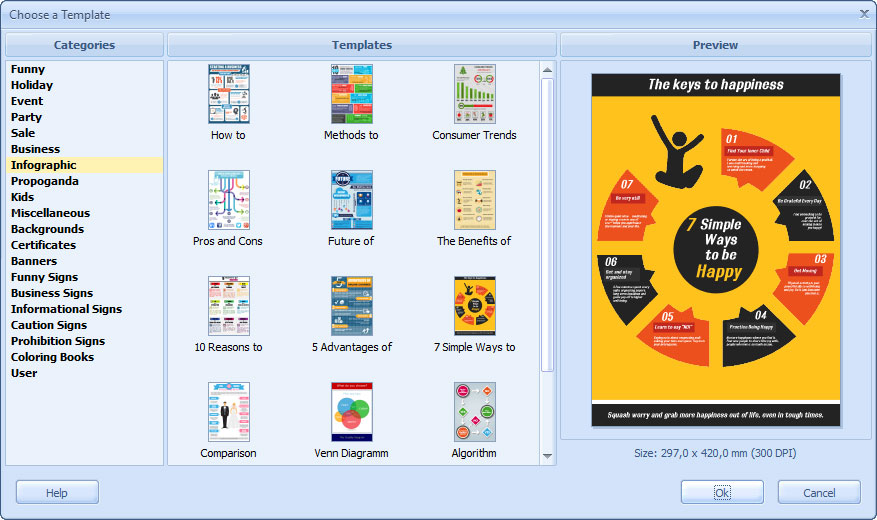
(Click to enlarge)
2. Redesigning of an infographic poster
The infographic maker from RonyaSoft features a simple interface with convenient tool panel offering you all necessary editing and design instruments. A click on an object will open 'Object Properties' menu in which you can add effects, change size and position and other properties of a selected object.
You can choose Background replacing it with any image you like from your computer or making it of plain color.
To make an infographic with have changed the background and deleted unwanted objects.
The Text Properties Window
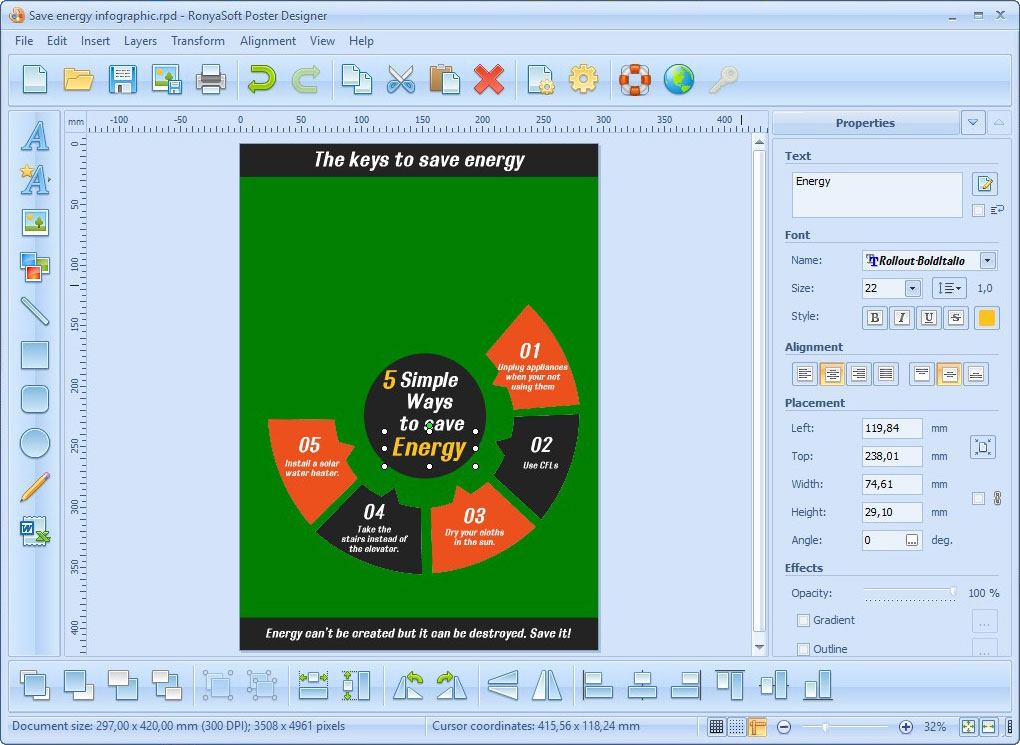
(Click to enlarge)
To make an infographic more specific you can add objects by uploading from your computer, choosing from template gallery as well as drawing objects on your own. To make an infographic example we have added an image and have drawn two ellipses and a rectanlge with rounded corners.
The next step is editing text on the infographic. RonyaSoft Poster Designer offers you to insert various types of special text as:
- Arc text.
- Wave text.
- Circle text.
- Projective text.
Inserting a special text object you will see a property menu opened in the right part of the infographic editor. In this menu you will see all the options for text editing. A window for typing in desired text, settings for fonts, sizes, stiles and effects of the text. Experiment with text on infographic poster to see which size or font will look better.
Mind that infographic is made for fast and simple communicating of complicated data. Thus its readability and scannability is of ultimate importance. To make an infographic more readable and easy to scan at a glance, choose standard templates. Apply less effects for main text, however use various styles to emphasize the title of infographic.
The Image Properties Window
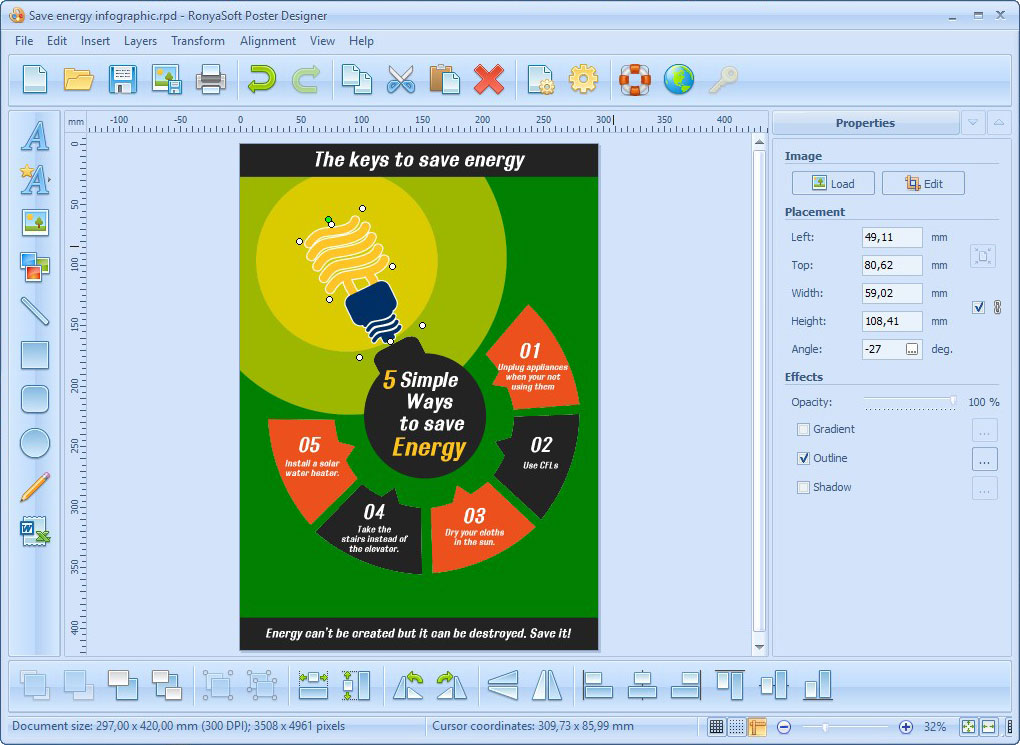
(Click to enlarge)
3. Saving and exporting of infographic poster
Now you are almost done! Your infographic needs to be saved and exported. The infographic maker from RonyaSoft applies the same principles as standard MS documents. Use 'File' menu and choose 'Save As...' option to save the document. All the projects are saved in .rpd format. After you save the infographic you will then be able to save it as a template for your next projects or export poster to JPEG or PDF formats. This will be of great use for you if you need several pieces of information in the same theme domain, for example energy saving techniques. Using single design and form will make your infographic more recognizable and easily understandable.
4. Printing of infographic
Infographic maker offers two simple ways how to print your infographic. The tool panel of graphic editor from RonyaSoft presents a standard 'Print' icon, clicking on which will open a 'Printout setup' menu where you will be able to adjust placement to standard size of paper, orientation. The preview window will show you all the adjustments applied instantly to an infographic.
Printout Setup Dialog Box
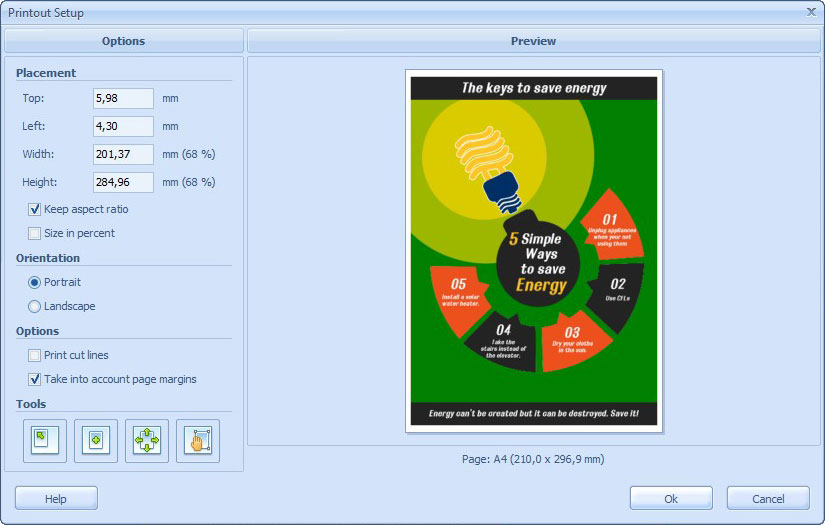
(Click to enlarge)
Mind that some projects are designed to be printed in larger formats than standard A4. For that case RonyaSoft offers a special tool – RonyaSoft Poster Printer to get your infographic printed on multiple pages.
Still doubting how to make an infographic avoiding those complex applications overwhelmed with useless options and features you will never use? Then RonyaSoft poster maker is right for you. The editor uses the basic principles of object changing and editing familiar to you from MS documents. Using infographic maker you will avoid learning curve and will be ready to create great looking posters, banners, signs, certificates and other projects right after installation of the application!