01. How to print a poster?
As we have already learned, a poster is any piece of paper designed to grasp attention of target audience and to communicate important message to a target user. To achieve its main goal, a poster needs to be of a noticeable size apart from featuring great design and convincing message. Unfortunately, printers for home usage do not support poster prints and large formats.
There are various ways of how to print your own poster in large format, however none of the ways eliminates using specific software to locate and crop image.
The task can be performed in CorelDraw or PhotoShop (or any other graphic editor), but these tools are:
- For pro users – thus, having no specific knowledge, it will take time to choose proper options and to get the task done.
- Expensive solutions presenting too much of specific options which you will not use.
To get the task done you need a simple, yet effective tool which will simply consider your basic needs of poster printing:
- Poster size.
- Whether a poster needs glue margins or not.
- Whether it needs to be cropped/scaled or not.
Attempts to print a poster and to compile A4 pieces into a valid, readable one fail without specific software. In this tutorial we will show you how to print a poster at home having only a standard printer supporting A4 format as largest one.
I Want You Poster

(Click to enlarge)
You will print your own poster which will look like this one.
We will illustrate the process steps with this I Want You for US Army printed on 4 sheets of A4 paper.
1. Image choice
Choose an image for your poster. These are few recommendations on which images meet the goal the best way:
- An image must attract attention — choose non-trivial images with great potential to create WOW-effect.
- An image must be of high quality — mind that the image will be printed in large format. To preserve readability and WOW effect then the initial image must have high resolution.
- An image for your poster print should not contain fine details – they will just distract reader attention.
To upload a chosen image to the poster prints application is easy. You can use one of three ways which is more convenient for you:
- Using standard “insert image” button.
- Using copy/paste mode.
- Uploading image from a digital camera or scanner.
- Using drag and drop mode.
You will see the next buttons in the menu. You can choose any way. The result will be equal.
Choose Image Step
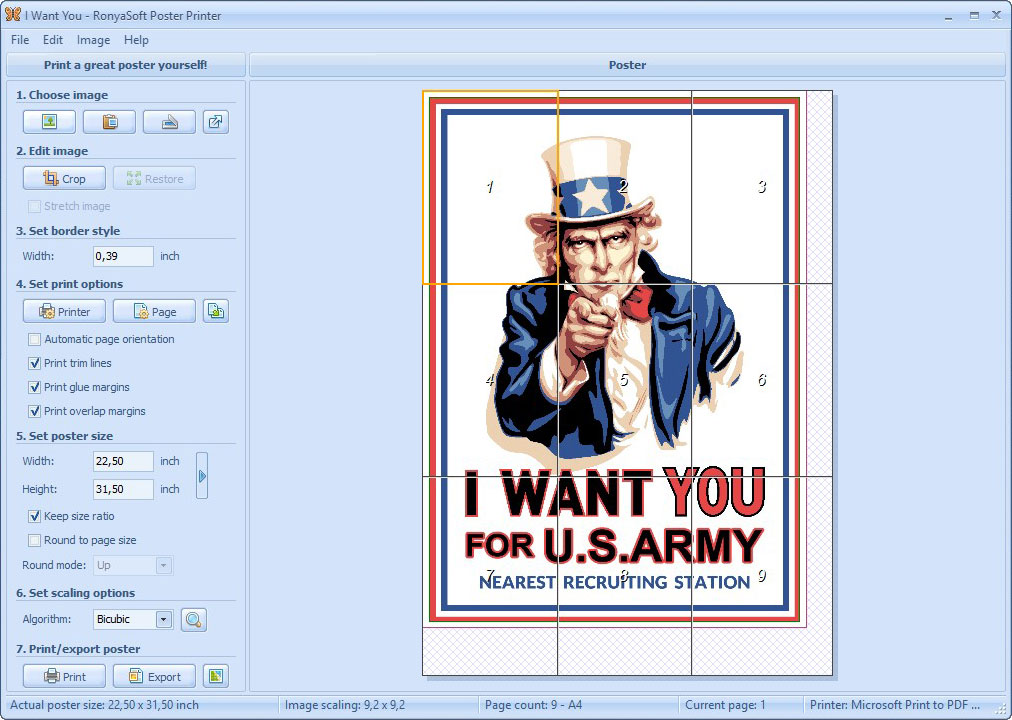
(Click to enlarge)
2. Image cropping
As our poster is ready, then we do not need to crop it. Crop feature is for cases when an uploaded image:
- Has unnecessary details.
- Is bigger than needed.
- Badly centered and cropping will help to move a desired element of the image to the center.
To crop an image for poster print you can set a new size in pixels or just drag a border of an image and then center an image focusing on key details.
Image Cropping Dialog Box
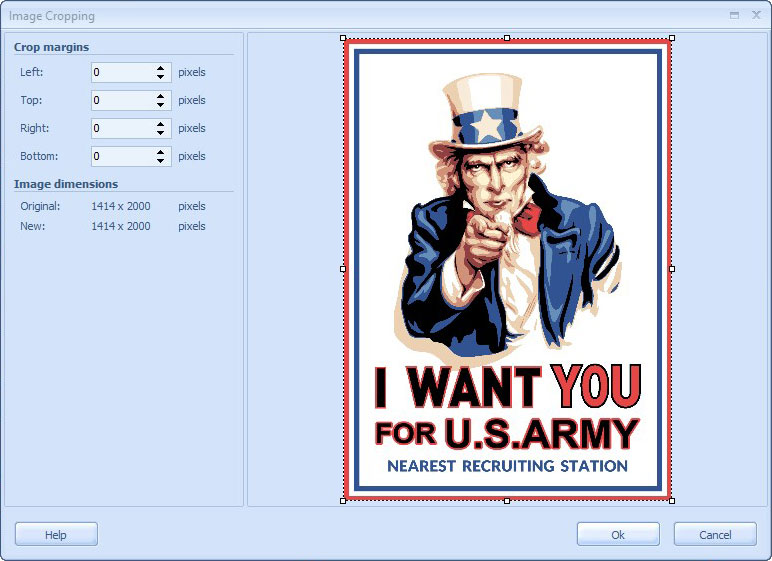
(Click to enlarge)
3. Deleting borders
If you crop an image and it will get smaller than a poster prints size than white borders can be automatically added to the edited poster. To avoid such case and to delete borders, than set 0 width in the Set border style window.
4. Poster print setting
As our goal is standard poster print we need to activate all three options which are Print trim lines, Print glue margins, Print overlap margins.
The trims and margins are essential to get enough space to glue the pages to each other and to align the image precisely.
5. Set poster size
Now the poster is almost ready for poster print. To print your own poster you need to set a size. To do this we need to activate the option 'Round to page size' and scale the poster in such a way to get it printed on 4 pages.
As our image we use to illustrate the tutorial does not get deformed, then clear a tick box of 'Keep size ratio'.
The option 'Keep size ratio' adjusts set poster size to the image proportions.
The option 'Round to page size' will fill up a set number of pages with an image.
On clicking the arrow on the right side you will discover predefined poster prints sizes.
The application will automatically calculate the number of pages considering poster print settings, paper properties and edited poster size.
Set Poster Size Step
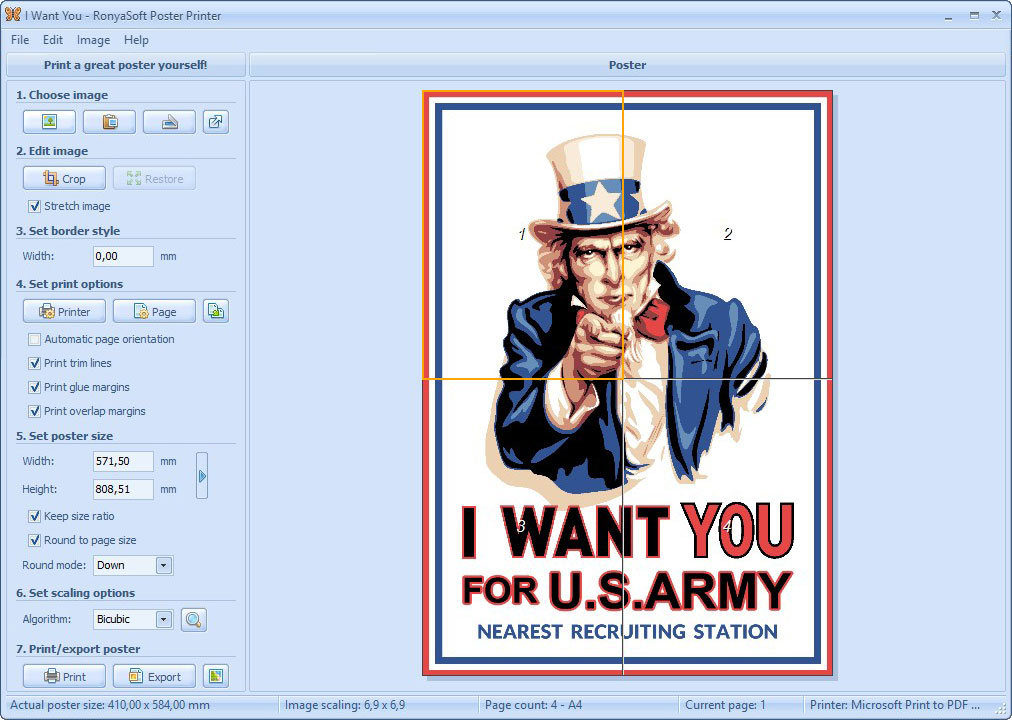
(Click to enlarge)
Read more on setting poster print size.
6. Image Scaling Setup
To choose a proper way of scaling use a drop down menu which will show you the next options:
- None.
- Bilinear.
- Bicubic.
- Lanczos.
- Hermite.
Image Scaling Setup Dialog Box
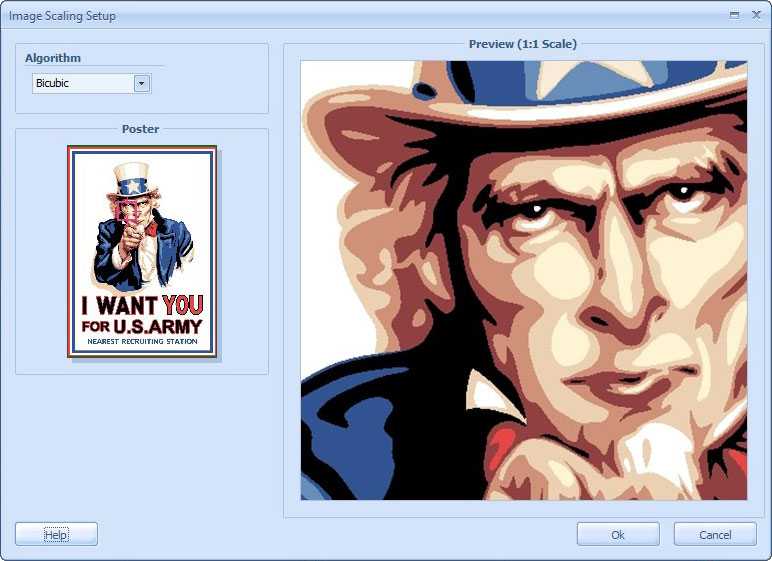
(Click to enlarge)
Complex algorithms are for conversion of large format images. You can try any of the proposed algorithms to see in which your picture will look best. Mind that complex algorithms need more time to be applied.
Keep in mind that if you fail to set an option and to adjust a poster print image, if you doubt the quality of poster you are going to print, then you can cancel all the changes applied and get back to the previous version of the image.
7. Poster Printing
Poster print is a final step of editing and setting your poster in the application. We strongly recommend to check all the changes made to the initial poster once again before setting the poster to printing.
To print your own poster on multiple pages is simple and easy. To initiate the poster prints process you need to click a 'Print' button.
The click will open a final dialogue window in which you will need to choose a printer and set a number of copies. We recommend to print a single copy to estimate how poster print looks like.
After you will see that poster looks well, you can set other copies to printing. Get back to printing other copies after you will splice the first cope successfully.
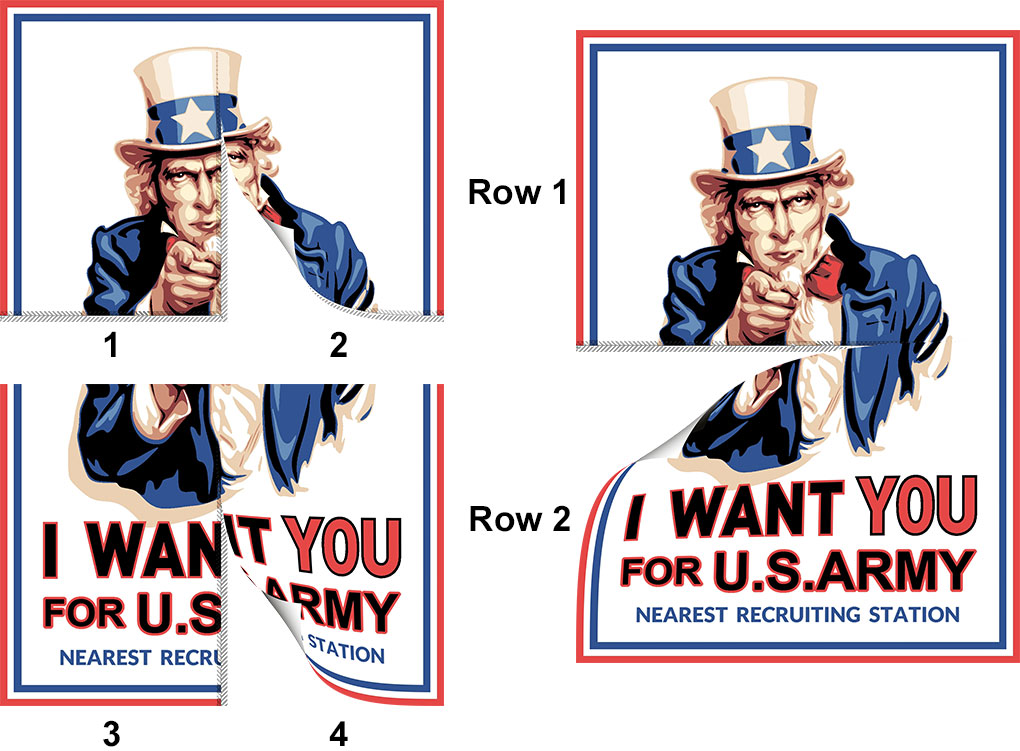
8. Poster Splicing
To put the pieces of your poster together you will need a glue and patience. Follow the next algorithm:
- Take pages 1 and 2 and glue them in the next order: page 2 overlaps page 1.
- Do the same with pages 3 and 4 (page 4 overlapping page 3).
- Glue row 1 (pages 1-2) to row 2 (pages 3-4) (row 2 overlapping row 1).
Poster Splicing
(Click to enlarge)
Carefully fit pages to each other. Try not to exceed the trim boundaries.
RonyaSoft Poster Printer offers the simplest available way how to print posters of large formats (multi-page printing) with no extra efforts applied. This is a perfect tool to avoid additional expenses and to print posters on multiple pages in high quality using standard printers.
To print a poster you will need only to choose necessary setting. The processed is well optimized and automated.
As a result you will get perfectly optimized and aligned poster, which you will never be able to print in such an easy way without RonyaSoft Poster Printer and tons of efforts.
Follow our tutorials and print posters and banners in high quality in few easy steps right away!