05. How to print a map?
A map is a schematic depiction of elements located in a certain space. There are various types for different purposes: physical and political maps, maps of streets and roads, climatic and relief maps.
Maps are essential foe educational purposes providing kids a clear understanding of geography. Maps are used in offices and are essential for various businesses. Using a map on the wall you can pin your offices and store units of your local competitors. In such a way you will also be able to estimate the area for local marketing and your brand promotion.
The greatest benefits of a printed map are:
- Clear visualization.
- Always in front of your eyes.
- Easy collaboration on strategic planning tasks, research and home tasks for students.
However the key goal of any map is to present clearly the locality in fine details. How to make a map and print it using standard home printer supporting A4 format as a maximum one?
There are different ways of how to make a map: from DIY from scratch to downloading ready-to-print maps. No matter in which way you will create a picture, you will face the same challenge of precise map print. Having no specific software you will need to locate an image on paper, to properly set margins for aligning and putting a print map together. Often the challenge ends up in piles of wasted paper and lots of wasted hours and efforts!
This tutorial will teach you how to make a map with RonyaSoft Poster Printer in few clicks and how to print a map on multiple pages and to get a high quality, well aligned picture of locality. The map will be printed on 6 sheets of A4 paper. This format is large enough to visualize fine details and to make any map clearly readable.
To print a map you will need a set of tools from RonyaSoft. If you have a ready to print map, but you just need to scale it, then RonyaSoft Poster Printer will be quite enough for you. If your goal is to compile maps, lay on map over another, then we recommend using RonyaSoft Poster Designer first.
Following this map print tutorial you will get the map which will look like this one:
The Map
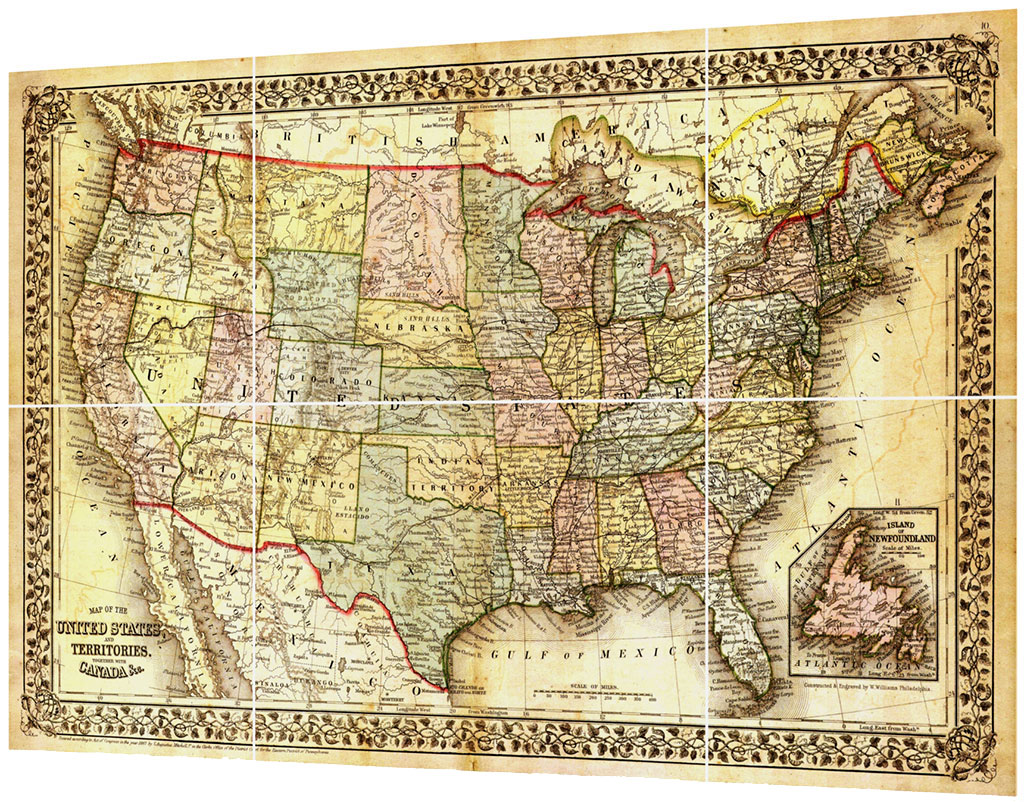
(Click to enlarge)
This map is created, edited and printed with RonyaSoft Poster Printer and then spliced.
1. Image choice
This map creator allows you to choose any image stored on your PC using one of the ways:
- Upload an image from file (please, check the details here) — supported formats are bmp, gif, jpg, png, tif, wmf, emf.
- Copy and paste an image from any application.
- Upload an image from digital sources as scanners or cameras.
- Using just drag and drop mode.
Choose Image Step

(Click to enlarge)
Mind that not every map image will suite the goal. A map commonly features very fine details. Thus the quality of the initial image must be high, otherwise you will get low quality map when the image will be scaled to the size of 6 sheets of A4 paper.
2. Editing print settings
If an uploaded image contains unnecessary details or you have a map of a town and you need only a certain district, then use 'Crop' option. On clicking 'Crop' button a dialogue window will appear.
You can set the pixels to crop from each side or just drag the borders of the image to get a necessary size. The selected area can be centered. If the result is unsatisfactory, then you can click 'Restore' button and get a step back to the initial size of the image.
The option 'Stretch image' will be deactivated to keep the proportions of the image and to avoid distortion of the map.
Map creator offers you to set borders of the map. The width is measured in inches by default. To change the borders measurement, visit the Application Settings. Mind that all values will be displayed in newly set measurement units.
Also on this step RonyaSoft map creator offers you to set a printer you will use to print a map and a page. You can change page settings (margins, glue and overlap). We recommend you use custom unprintable page margins only in rare cases. Reed Help for more info.
Page Setup Dialog Box

(Click to enlarge)
As a map is created and printed as a wall poster, then the recommendations for map print will be the next:
- Glue margins should be OFF.
- Overlap margins should be ON.
Specify a desired size of your map. Enter Height and Width. You can also click an arrow button on the right side and to choose one of the predefined sizes.
Watch the options:
- Keep size ratio – if this option is checked then the poster size will be aligned to the image proportions.
- Round to page size – if this option is checked, then the image will fill the area of the poster completely.
Set Poster Size Step
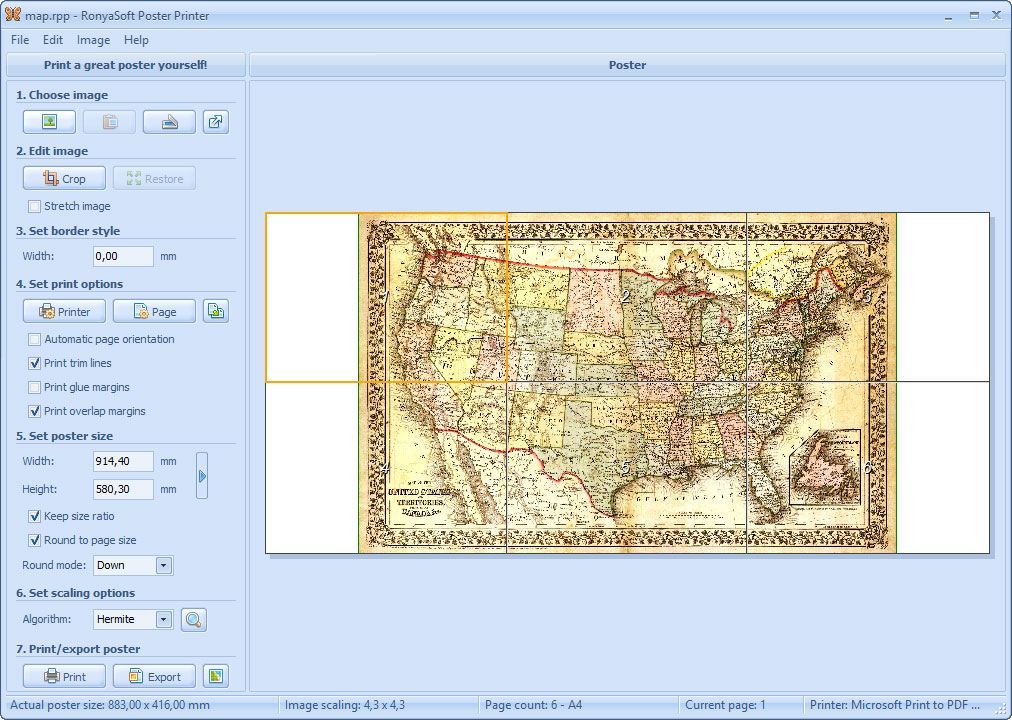
(Click to enlarge)
RonyaSoft Poster Printer offers various algorithms of image scaling. You can choose a necessary one from a drop-down list. We choose Hermite Algorithm for this map.
To check how a scaled image will look like, you can click on any part of the image in a 'Image Scaling Setup' dialog box. Mind that algorithms can be applied only to bitmap images as vector ones are already scaled without any loss in quality.
Image Scaling Setup Dialog Box

(Click to enlarge)
3. Map printing
Congratulations! You are almost done. On this step RonyaSoft Poster Printer requires specific setting of map print.
Click a 'Print' button to open map print settings. Select your printer (poster Printer application supports most of the popular brands and models of printers) and specify a number of copies which will be printed at a time. We recommend to print one copy at first to see how your map looks like on paper and then set to printing other copies or get back to editing steps.
To estimate a quality of printed image, please, print a current page of your map.
4. Map splicing
Map is easy to splice as you need only to get rid of trim margins and to pin the map to the wall following the numbers of pages. You are done!
Poster Splicing
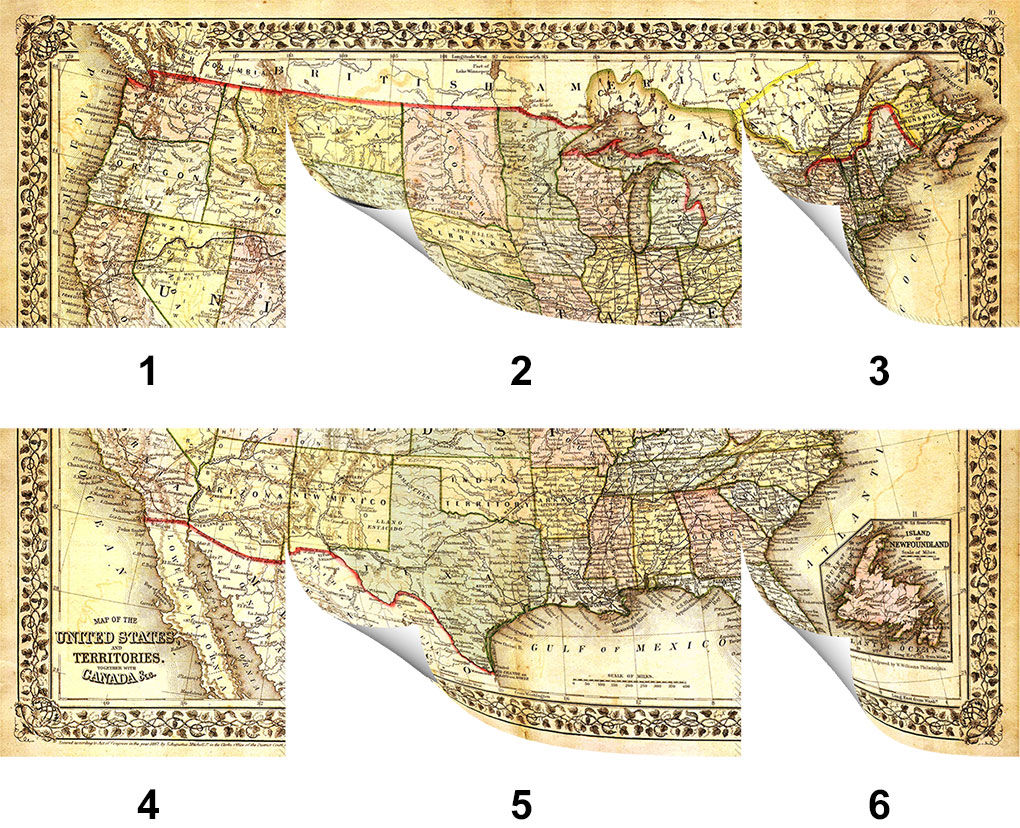
(Click to enlarge)
If you face some problems with map image splicing then visit the page of Splicing instructions.
Final tips of how to make a map.
Consider future map usage to choose a proper quality of paper. If you are going to pin the map frequently, to stick notes over the map, then we recommend choosing glazed thick paper. This will improve durability and increase the lifespan of your map.
This tutorial describes step by step how to make a map using a simple RonyaSoft application – Poster Printer.
A single application works as map creator and offers comprehensive map print options to print a map of high quality of zoom.
With RonyaSoft Poster Printer you will get a professionally designed and printed map using your standard home printer able to print max A4 format. The application simplifies image compilation and automates all calculating and aligning processes. Even if you lack specific design knowledge you will be able to get ultimate result!